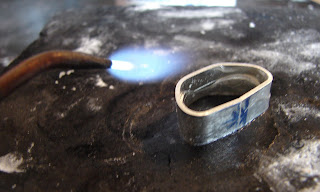
This custom wedding band is one of a pair made for a great Nova Scotian couple who will be married in July. They designed the rings themselves, preferring simple sterling silver bands with the curved design to represent their love for the ocean, as well as each other. See the ring come to life below.
1. The sterling sheet (0.8 mm thick) was measured to ensure the right ring size, and cut with a saw. A’s ring size is 7, so the silver needed to be 56.5 mm in length.


2. The silver strip was stamped with the couples' initials. These are new stamps, a finer font than my other ones, just got them from Rio Grande.


3. The small hole was drilled in the band to allow the saw blade to be inserted. A curved line was cut freehand down the length of the band, taking care to stop before the stamped initials.


4. To prepare for soldering, the edges of the band were sanded so that they met flush, tightly enough so that you don’t see light through the joint.


5. The band was fluxed, to clean the joint and to prevent firescale from forming on the silver. I solder with a Smith’s Little Torch, using propane and oxygen. To solder a joint like this, you want a bushy flame with a soft hiss, blue with a bit of orange. After soldering, the ring was pickled in an acid solution to clean it.

6. To make it perfectly round, the band was then put on the ring mandrel, and hammered with a rawhide mallet. Now it looks more like a ring.


7. The ring was then sanded with increasingly finer grades of sandpaper (from 180 to 600) to remove scratches. To give it a mirror shine, it was then polished with silicone discs. To finish it off, the ring was tumbled with stainless steel shot for fourty five minutes.

And there you have it, a sterling ring to last a lifetime.


That is so cool! One day I'll get to learn how to do that. Beautiful ring.
ReplyDeleteGreat work! Thanks for showing us your process, you are very skilled : )
ReplyDeleteI just found your blog a couple days ago and I love it!! thanks for showing us the start to finish on this ring.. Im so visual it helps to see every step.. I will be soon starting to learn to silversmith and this helps alot!! I also want to use some seaglass in my jewelry.. It is so beautiful.. Growing up on an island in the San Juans Wa... I guess It reminds me of home
ReplyDeleteSherice
May I add a tip? To make sure that before soldering the ends meet perfectly, bend the ring as shown, put it in a vice and saw through the gap. This will create perfectly matching ends!
ReplyDeleteThank you Purpur, I will try that!
ReplyDeleteWill you have any of these available in your shop anytime soon? Please, please :)
ReplyDelete